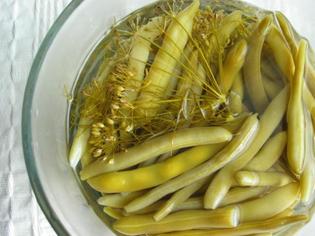
photo via: Food.com - my process wasn't quite that pretty
My first homemaking project was pickling - dilly beans, or pickled green beans.
I had a summer CSA share and got pounds of green beans at a time. I don't particularly like green beans fresh, but I found that pickling transformed the excess into a tasty snack. This was back in September, but I still have a jar left (talk about self-restraint!)
I used a recipe from Back to Basics, and took over half my communal kitchen for the pickling/canning process. My roommates weren't too happy (I picked a potluck night for my experiment), but it was worth it.
The process seemed complicated at first, but it's actually pretty simple, and you can do this with any kind of veggie you like.
Short Version, for the simply curious
So, it's slightly more detail-specific than that, so here's the real recipe, for those who want to do it themselves.
I had a summer CSA share and got pounds of green beans at a time. I don't particularly like green beans fresh, but I found that pickling transformed the excess into a tasty snack. This was back in September, but I still have a jar left (talk about self-restraint!)
I used a recipe from Back to Basics, and took over half my communal kitchen for the pickling/canning process. My roommates weren't too happy (I picked a potluck night for my experiment), but it was worth it.
The process seemed complicated at first, but it's actually pretty simple, and you can do this with any kind of veggie you like.
Short Version, for the simply curious
- Wash beans & jar.
- Pack beans and spices in the jar.
- Boil a vinegar/water mix with salt.
- Pour hot vinegar mix over beans, and close the jar.
- Submerge jar under water and boil for a while.
- Remove jar from water bath & wait for it to cool.
- Note the satisfactory lid suction when it's fully cooled, and then store it away!
So, it's slightly more detail-specific than that, so here's the real recipe, for those who want to do it themselves.
Long Version, for the doers
Simple enough. Plus, it's a great feeling to be able to crack open a jar of tasty pickled beans (or any other veggie) in the middle of January, when there is no local produce to be had - trust me on that one!
- Wash 4 lb. firm, fresh, unwaxed green beans and remove ends or any bruised/weird spots.
- Cut beans into 2-inch pieces and divide among 7 hot, sterile pint jars.
- Put 1/4 tsp. red pepper, 1/2 tsp. mustard seeds, 1/2 tsp. dill seeds, and 1 clove garlic into each of the jars.
- Combine 5 cups water with 5 cups vinegar (either white or apple cider, with 4-6% acid content), and 1/2 cup salt (pure, granulated, with no additives), and bring quickly to a boil.
- Pour boiling liquid over beans, leaving 1/2-inch headroom.
- Process jars in a boiling water bath for 10 minutes (or more, if you're at high altitude, like me).
- Remove from heat and, when cool, label lid with description and date.
- Store in a cool, dry location.
Simple enough. Plus, it's a great feeling to be able to crack open a jar of tasty pickled beans (or any other veggie) in the middle of January, when there is no local produce to be had - trust me on that one!


